 Domains SearchSearch available domain names and claim yours in just a few clicks.
 .GH DomainsFind and register a trusted .gh domain for your business or idea.
 Web HostingAffordable web hosting solutions designed for performance, uptime, and scalability.
 cPanel HostingManage your website without the stress. cPanel hosting gives you everything in one place.
 Reseller HostingCreate, manage, and grow your hosting clients using reliable reseller hosting tools.
 Windows HostingWindows hosting that works smoothly with Microsoft frameworks and applications.
 Email HostingProfessional email hosting that keeps your business communication reliable and secure.
 WordPress HostingFast and secure WordPress hosting optimized for smooth performance and easy management.
 Affiliate ProgramEarn commissions by referring customers to our hosting and domain services.
 .COM Domains
 All DomainsFind the right Ghana domain for your brand and lock it in fast.
 Domain TransferMove your domain to us with a smooth, secure transfer process.
 Whois LookupCheck domain ownership and registration details instantly with our WHOIS lookup.
 SSL CertificatesSecure your website and protect your visitors with trusted SSL certificates.
 VPS HostingUpgrade to VPS hosting today and enjoy better speed, uptime, and flexibility.
 Managed VPSManaged VPS for businesses and developers who want full control without server management worries.
 Dedicated ServersGet maximum speed and reliability with dedicated servers built for serious websites and apps.
 AI Website BuilderStart your website today with our AI builder and go live in minutes.
 Online ShopStart selling online today with your own professional online shop.
 Web Design ServiceProfessional web design services that make your brand stand out online.
 Local SEO
 BlogHelpful articles, tutorials, and updates for building your online presence.
 Contact UsNeed help or more information? Connect with us anytime.
A website can commonly be accessed using two versions of the same address: example.com, or www.example.com.
If the www version isn’t configured correctly, visitors may hit an error, or they may get redirected to the non-www version without you meaning for that to happen.
Either outcome looks broken to a visitor, even though the site technically works fine on one version.
Adding www usually involves two things working together.
First, creating a DNS record that tells the internet where the www version should point.
Second, configuring your website or server to actually recognize and respond to that www hostname.
It’s worth being clear on one point upfront: adding www isn’t as simple as typing “www” into your domain’s name field somewhere.
It requires real configuration on both the DNS side and the hosting side, and this guide walks through exactly how that works.
What Do You Need to Add WWW to Your Domain?
Before starting, make sure you have the following in place.
- Access to your domain’s DNS settings, wherever those are managed.
- Access to your hosting account, since the server also needs to recognize www.
- The correct DNS record type for your specific setup.
- SSL configured so the www version loads securely too, not just the root domain.
- And a website or server actually configured to respond to requests for the www hostname.
The exact steps depend on where your DNS is managed, whether that’s through your domain registrar, your hosting provider, or a separate DNS service.
This guide covers the general process, with Truehost referenced as a specific example along the way.
How to Add WWW to Your Domain
Step 1: Log In to Your DNS or Hosting Account
DNS management is usually found in your domain registrar’s dashboard or your hosting provider’s client area, often under a section labeled DNS Management, Zone Editor, or similar.
For Truehost specifically, this lives under your Truehost account, in the domain or DNS management section of the client area.
Interfaces do get updated over time, so if the exact menu labels look slightly different from what’s described here, look for anything referencing DNS, Zone Editor, or Nameservers.
Step 2: Find Your DNS Records
Once you’re in DNS management, you’ll see what’s called a DNS zone.
This is essentially a list of all the records controlling how your domain behaves.
You’ll typically see A records (pointing a domain or subdomain to a server’s IP address), CNAME records (pointing a subdomain to another domain name), MX records (controlling email delivery), and TXT records (used for verification and authentication purposes).
For adding www, you’re specifically looking for whether a www record already exists, or whether you’ll need to create one.
Some hosting setups create a www CNAME automatically the moment you point your domain at your hosting server, which is common on cPanel-based hosting.
Others require you to add it manually as a separate step.
Scan through the existing records in your zone first, since you might find www is already there and simply needs a small correction rather than a fresh record from scratch.
Step 3: Create a WWW Record
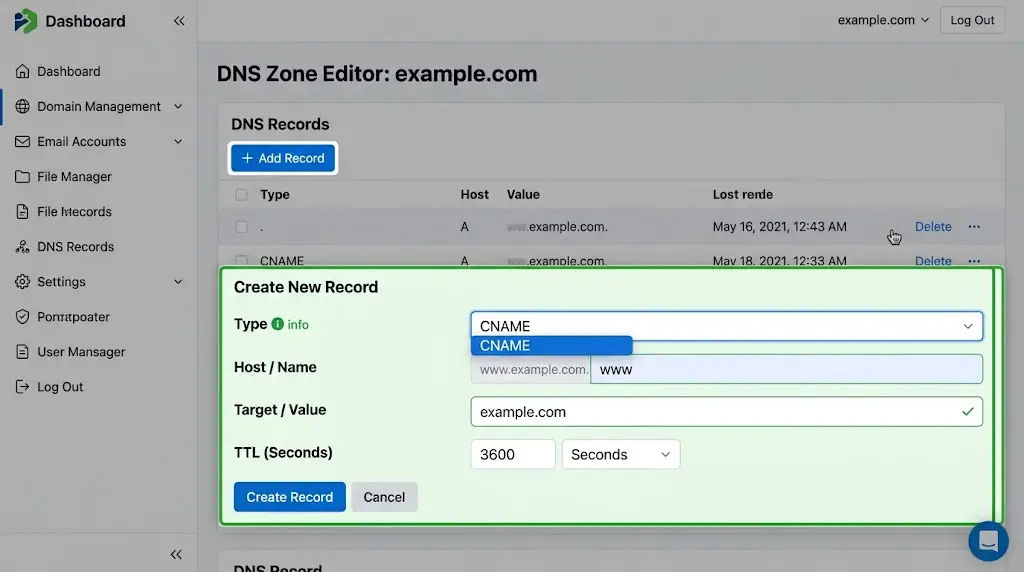
In most setups, you’ll create a CNAME record.
Set the Type to CNAME, the Name or Host to www, and the Target or Value to your root domain, something like example.com.
This tells DNS that www.example.com should be treated as pointing to the same place as example.com.
That said, the exact record type depends on your specific hosting setup.
Some configurations use an A record for www instead, pointing directly to the server’s IP address rather than to the root domain via CNAME.
If your hosting provider gave you a specific IP address rather than a domain to point to, an A record is likely the correct choice instead.
Step 4: Save the DNS Record
Once the record details are entered correctly, save the change.
Double-check for typos before saving.
A single incorrect character in the target value can break the record entirely and cause the www version to fail to resolve.
Step 5: Configure Your Website to Use WWW
Here’s an important detail worth knowing clearly.
Adding the DNS record alone doesn’t automatically mean your website will correctly serve content on the www version.
Your web server or hosting configuration also needs to recognize www.example.com as a valid way to reach your site, not just example.com.
On most standard hosting setups, particularly cPanel-based hosting like Truehost’s, this typically works automatically once the DNS record is in place, since the server is usually configured to treat www as an alias for the root domain by default.
But on custom server setups or specific platforms, you may need to explicitly add www.example.com as a recognized domain alias in your server or application configuration.
Step 6: Configure HTTPS for WWW
Make sure https://www.example.com actually works, not just the non-secure http version.
This generally means your SSL certificate needs to explicitly cover the www hostname, either through a certificate that lists both example.com and www.example.com, or a wildcard certificate that covers all subdomains.
Most modern hosting providers, including Truehost, issue free SSL certificates through Let’s Encrypt that automatically cover both the root domain and its www version.
Still, it’s worth confirming this explicitly rather than assuming it’s covered.
If you’ve recently added the www DNS record for the first time, you may need to reissue or renew your SSL certificate afterward so it picks up the new hostname.
Certificates issued before the www record existed sometimes only cover the root domain, which is a common reason www loads without a secure connection even after DNS looks correct.
Step 7: Test the WWW Version
Once everything’s in place, test all four common variations of your domain to confirm they all work correctly.
Check www.example.com, https://www.example.com, example.com, and https://example.com.
All four should load your website successfully, ideally with the non-secure versions automatically redirecting to HTTPS.
How to Redirect Your Domain to WWW
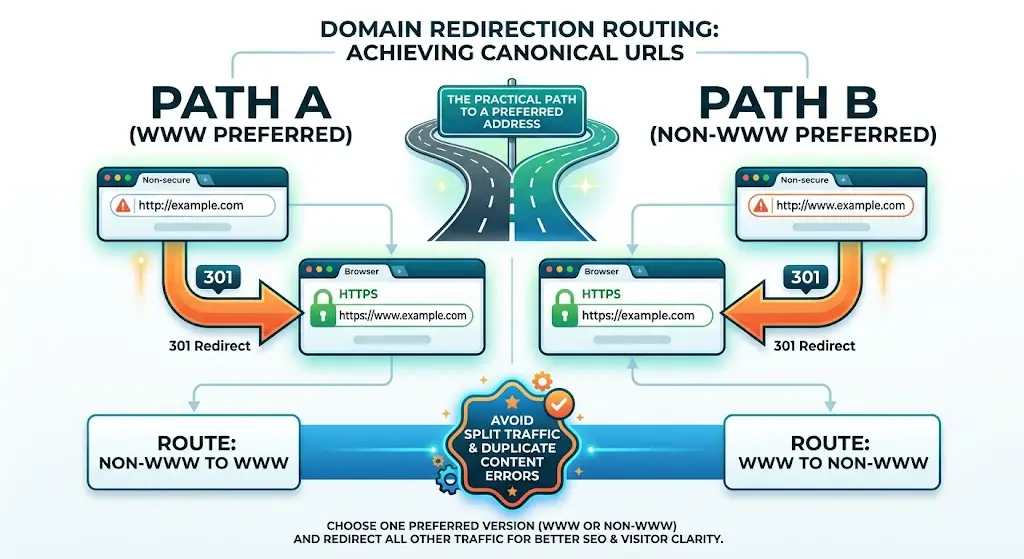
Here’s an important distinction worth separating from simply making www work.
You can configure your domain so that example.com redirects to www.example.com, or the reverse, so that www.example.com redirects to example.com.
The key isn’t which one you choose, it’s choosing one preferred version and sticking with it consistently.
a) WWW Redirect
This means example.com automatically redirects to www.example.com.
Visitors typing the non-www version get sent to the www version instead, and www becomes your site’s canonical, preferred address.
b) Non-WWW Redirect
This works the other way around: www.example.com redirects to example.com.
Visitors typing the www version land on the non-www version instead, making the root domain your preferred address.
Whichever direction you choose, you generally don’t want both versions operating as separate, independent copies of the same website.
Having both live simultaneously without a redirect between them can split search engine signals across two versions of the same content.
It can also confuse visitors who bookmark or share one version over the other.
How Long Does It Take for WWW to Work?
DNS changes don’t apply instantly everywhere.
Some changes appear within minutes.
Others can take considerably longer to fully propagate, generally settling within a few hours, though it can take longer in some cases depending on caching along the way.
Local DNS caches held by internet service providers and individual devices can affect exactly what a given visitor sees at any given moment during that window.
It’s worth knowing that clearing your browser cache doesn’t necessarily clear DNS caching.
These are two separate caching layers, and DNS caching happens closer to the network level rather than inside your browser specifically.
If www still isn’t working shortly after making the change, that’s often just propagation still catching up rather than a sign something’s configured wrong.
Common Problems When Adding WWW
| Problem | Likely Cause |
|---|---|
| WWW shows a DNS error | The www record hasn’t been created yet, or was entered incorrectly in the DNS zone |
| WWW shows the wrong website | An incorrect DNS record value, or a hosting configuration issue pointing www somewhere unintended |
| WWW works but HTTPS doesn’t | SSL certificate doesn’t cover the www hostname, or hasn’t been reissued to include it |
| The root domain works but WWW doesn’t | The www DNS record is missing entirely, or hasn’t propagated yet |
| Both WWW and non-WWW versions load separately | No redirect or canonicalization configured between the two versions |
| WWW redirects in a loop | Conflicting redirect rules, or a mismatch between DNS and HTTPS/SSL configuration |
How to Check if WWW Is Properly Configured
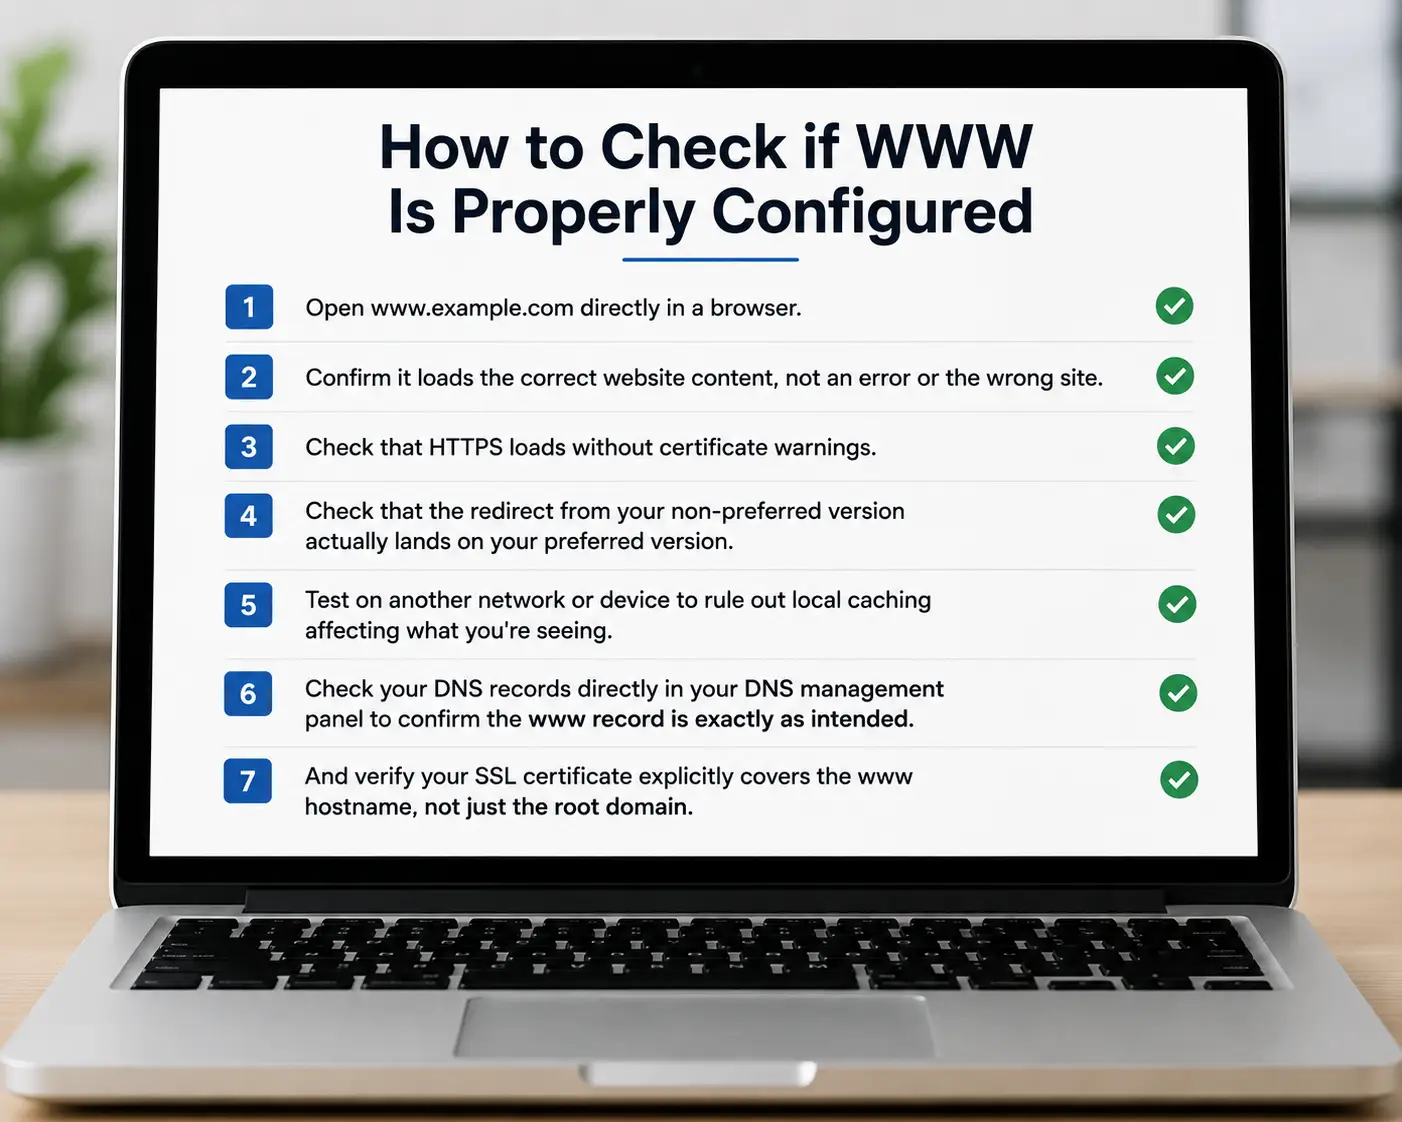
Run through this quick checklist once you believe everything’s set up.
- Open
www.example.comdirectly in a browser. - Confirm it loads the correct website content, not an error or the wrong site.
- Check that HTTPS loads without certificate warnings.
- Check that the redirect from your non-preferred version actually lands on your preferred version.
- Test on another network or device to rule out local caching affecting what you’re seeing.
- Check your DNS records directly in your DNS management panel to confirm the www record is exactly as intended.
- And verify your SSL certificate explicitly covers the www hostname, not just the root domain.
Make Your Domain Work With the Version You Prefer
To recap the core concept here: www is technically a subdomain, not a separate feature you toggle on.
You configure it through DNS, and a CNAME record is the most common way to point www at your root domain, though an A record works too depending on your setup.
Beyond DNS, your website and SSL certificate both need to actually recognize the www hostname for everything to load correctly and securely.
Finally, choose either www or non-www as your preferred version, and set up a redirect so the other version consistently points to it, rather than letting both run as separate copies of the same site.
If you’re managing your domain and hosting through Truehost, DNS management and free SSL covering both www and non-www versions are handled directly through your client area, making this whole setup considerably more straightforward.
Log into your Truehost account to configure your domain’s DNS and get www working correctly today.